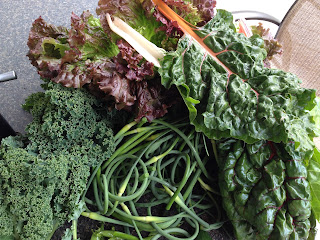
We are trying a few new things in our vegetable garden this year. This is in part because we expanded the garden, nearly doubling it in size. So there are many more plants, more rows, and longer rows to tend to.
Since watering is so essential to plant growth and is time-consuming, we installed drip irrigation. This is experimental as there are various options for drip tape thickness, diameter, emitter spacing, and flow rate; we weren't sure what type to install. So we relied on guidance from Trevor at Brookdale Fruit Farm in Hollis, New Hampshire. They sell irrigation supplies and when we showed up he put together the various components that we needed: a big (too big) roll of Toro Aqua-Traxx irrigation drip tape, shut-off valves, drip couplers (if we spring a leak in the tape), insert tool (to make the holes in the mainline), and the pressure valve.
The pressure valve cost $95, but apparently it is essential to avoid blowing out the drip tape. We have three raised beds in the backyard that we've rigged up with drip tape, but no pressure valve. If we blow holes in the tape we'll know that you do indeed need a pressure valve! Here is how the pressure valve set-up looks in the main garden.

Trevor sold us 4,000 feet of drip tape--the only size they carried. For those interested in the details: hose diameter 5/8", wall thickness 15 mil, emitter spacing 12". Apparently you can buy thinner tape--8 mil-- although I think the 15 mil will last longer, to be re-used from year to year. Later, we thought that closer emitter spacing, 4" or 8" would be better, but perhaps not available in the 15 mil thickness. We only used about 400 feet of tape for the various rows, so 4,000 feet was way, way more than we needed. After reserving another 600 feet for future use, I managed to sell the rest of the roll (3,000 feet) on Craigslist to a nice farmer from Effingham.
In addition to all the equipment from Brookdale, we still needed to buy the "mainline" which connects from the hose/valve to each drip tape. Trevor suggested buying (from Home Depot) 1" low density PVC pipe for use as the mainline. It took us a while to figure out how to use the insert tool (a $25 plastic tool!) to punch holes in the mainline. After another call to Brookdale for advice, Srini mastered the technique using a socket wrench and a hammer to pound the shut-off valves into the mainline. he had to do this on the paved driveway--a hard surface was necessary to penetrate the hard PVC pipe. Here is the end result.
And here is one of our 36" garden rows with two drip tapes, spaced about a foot apart.
Only time will tell whether this was a good investment. Already though we are spending far less time hand watering. The next three days of hot weather will be a good test of the effectiveness of the slow drip.
The other new technique this year is the use of the "Florida Weave" to stake the tomatoes. In the past we've caged each plant and staked the cage. After trying to puncture the landscape fabric with the 4-pointed cages and then realizing that we might have punctured the drip tape, we tossed out that approach. Instead, I placed 4-5-foot stakes in each tomato row, spaced every three tomatoes. Then wove the tomato twine from stake to stake, sandwiching each tomato plant between two strands. As the plants get taller, I'll repeat this a couple more times. Here is how it looks.
The Twine
The Weave
The Tomato Row
You can watch a nice You Tube video on doing the Florida Weave
here.
I am really enjoying the garden this year. Sure, it takes a bit of time, but I enjoy walking the rows each morning and evening to see how the garden grows, to check for pesky pests, and to harvest food for dinner.


